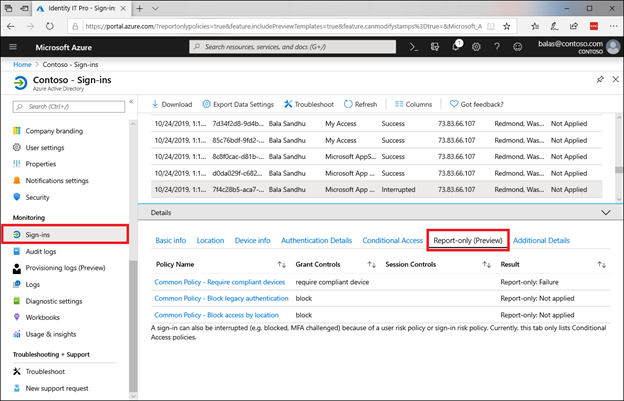
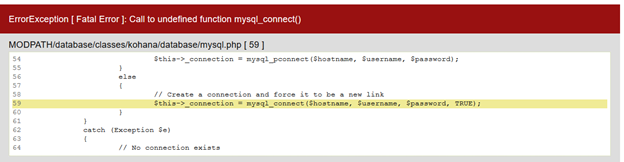
DevExpress – Incorrect route to ASPxUploadProgressHandlerPage.ashx
In case of error:
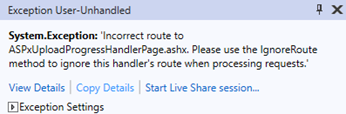
System.Exception
Incorrect route to ASPxUploadProgressHandlerPage.ashx. Please use the IgnoreRoute method to ignore this handler’s route when processing requests.
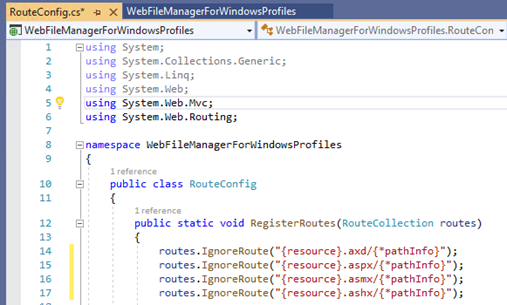
Please edit file RouteConfig.cs adding:
routes.IgnoreRoute(“{resource}.aspx/{*pathInfo}”);
routes.IgnoreRoute(“{resource}.asmx/{*pathInfo}”);
routes.IgnoreRoute(“{resource}.ashx/{*pathInfo}”);
Like this:
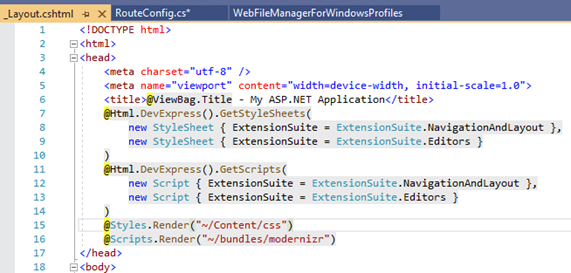
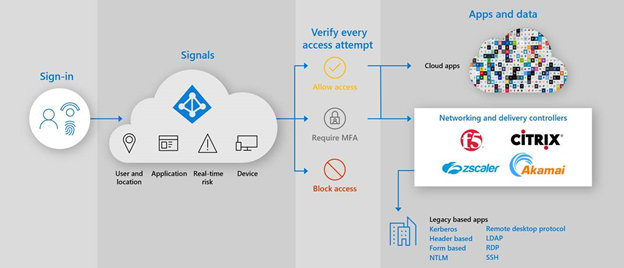
Please do not forget add to Layout file:
@Html.DevExpress().GetStyleSheets(
new StyleSheet { ExtensionSuite = ExtensionSuite.NavigationAndLayout },
new StyleSheet { ExtensionSuite = ExtensionSuite.Editors }
)
@Html.DevExpress().GetScripts(
new Script { ExtensionSuite = ExtensionSuite.NavigationAndLayout },
new Script { ExtensionSuite = ExtensionSuite.Editors }
)
Like this:


 .
. .
.