Wiedza
  • 0 Koszyk
  • Kontakt
  • Moje konto
  • Blog
  • MOC On-Demand – co to takiego?
  • MOC On-Demand – Co zyskujesz?
  • Kursy MS

News from the last quarter of 2019 year in the field of Azure Active Directory

Successor of Azure AD Connect: Azure AD Connect cloud

https://docs.microsoft.com/en-us/azure/active-directory/cloud-provisioning/what-is-cloud-provisioning

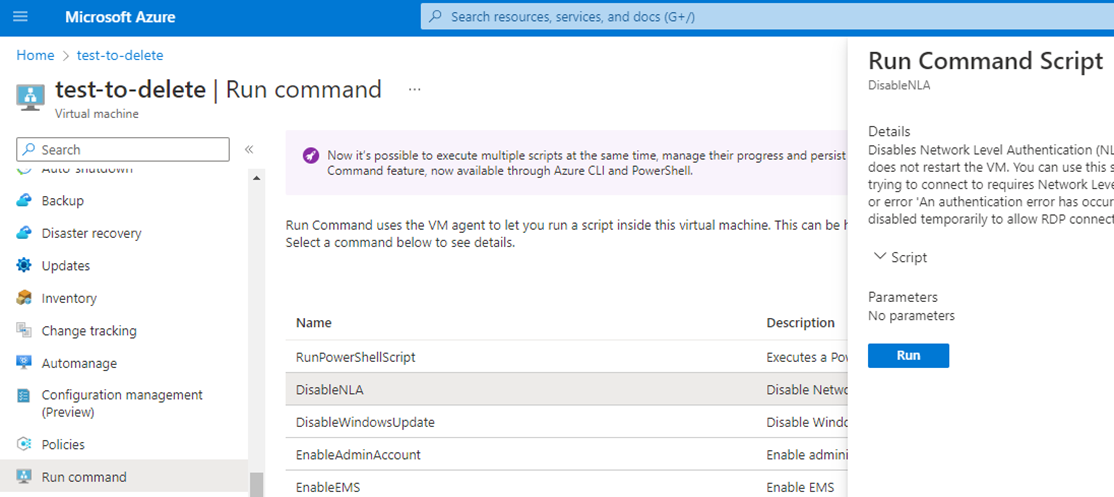
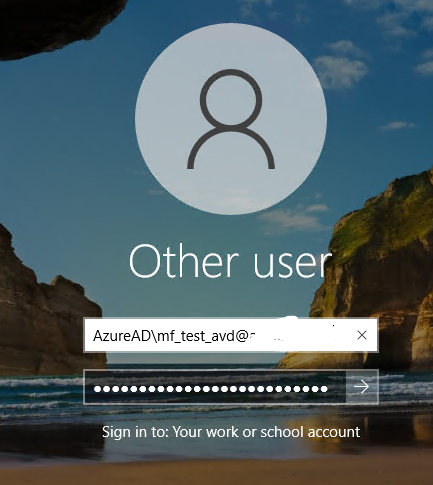
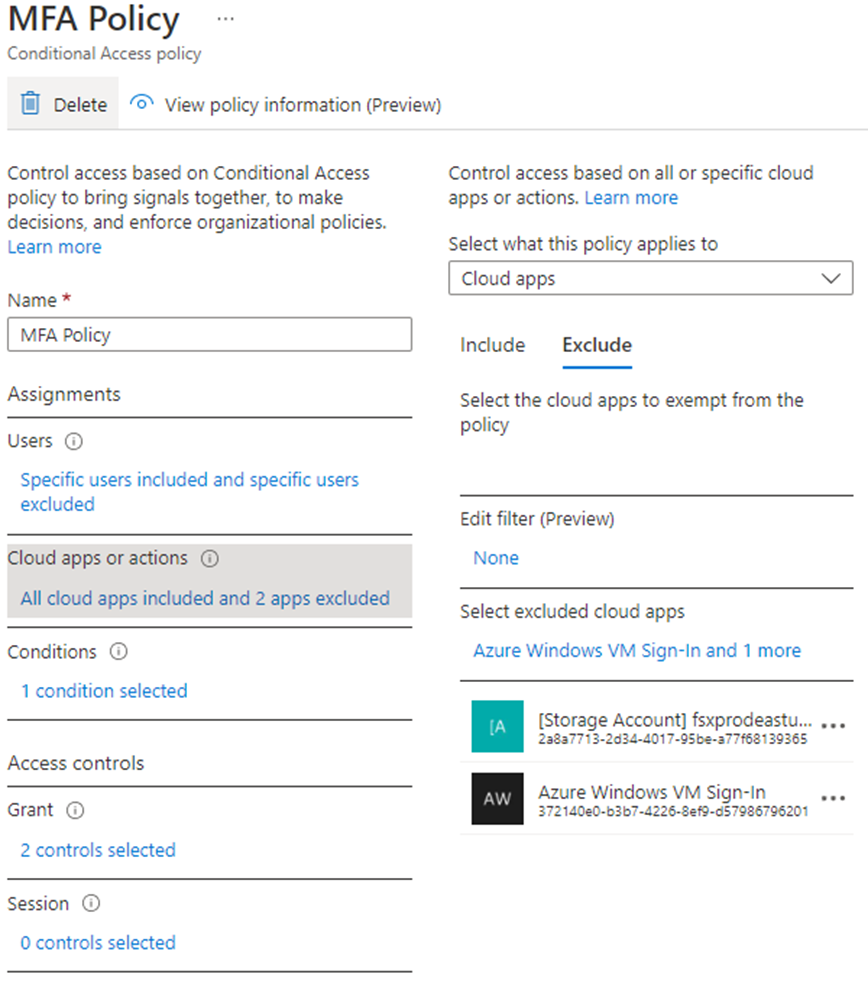
Azure AD authentication to Windows VMs

https://techcommunity.microsoft.com/t5/azure-active-directory-identity/azure-ad-authentication-to-windows-vms-in-azure-now-in-public/ba-p/827840

Conditional Access report-only mode

Evaluate impacts of new policies before rolling them out across the entire organization.

Monitor impact with Azure Monitor and the new Conditional Access Insights workbook.

News in Identity Protection

  • Added and enhanced signals
  • New detections
  • Improved APIs
  • New user interface
  • Azure Sentinel integration

https://docs.microsoft.com/en-us/azure/active-directory/identity-protection/overview-identity-protection

Security Defaults

Preconfigured security settings for common attacks

Basic level of security at no extra cost

https://docs.microsoft.com/en-us/azure/active-directory/fundamentals/concept-fundamentals-security-defaults

New build-in roles in Azure AD

  • Global reader
  • Authentication admin
  • Privileged authentication admin
  • Azure DevOps admin
  • Security operator
  • Several B2C roles
  • Group admin
  • Office apps admin
  • Compliance data admin
  • External identity provider admin
  • Kaizala admin
  • Message center privacy reader
  • Password admin
  • Search admin
  • Search editor

https://techcommunity.microsoft.com/t5/azure-active-directory-identity/16-new-built-in-roles-including-global-reader-now-available-in/ba-p/900749

https://docs.microsoft.com/en-us/azure/active-directory/users-groups-roles/directory-assign-admin-roles#available-roles

Azure AD entitlement management

  • Govern employee and partner access at enterprise scale
  • Automate employee and partner access requests, approvals, auditing and review

https://docs.microsoft.com/en-us/azure/active-directory/governance/entitlement-management-overview

Admin consent workflow

Admin consent workflow – gives end users a way to request access to applications that require admin consent.

Without an admin consent workflow, a user in a tenant where user consent is disabled will be blocked when they try to access any app that requires permissions to access organizational data.

  • Users can request access when user consent is disabled
  • Users can request access when apps request permissions that require admin consent
  • Gives admins a secure way to receive and process access requests
  • Users are notified of admin action

https://aka.ms/adminconsentworkflow/

Secure legacy apps with app delivery controllers and networks

  • Simplify secure access to on-premises legacy-auth based apps
  • Access apps that use Kerberos, header-based auth, form-based auth, LDAP, NTLM, RDP, SSH
  • F5, Citrix, Akamai, ZScaler
  • Allow use of conditional access and password less auth with on-prem apps

https://docs.microsoft.com/en-us/azure/active-directory/manage-apps/secure-hybrid-access

Migrate to cloud authentication by using staged rollout

Configure groups of users to use cloud authentication instead of federation

https://docs.microsoft.com/en-us/azure/active-directory/hybrid/how-to-connect-staged-rollout

Passwordless security key sign in to on-premises resources

https://techcommunity.microsoft.com/t5/azure-active-directory-identity/replace-passwords-with-a-biometric-security-key/ba-p/827844

Forest trust to an on-premises domain in Azure Active Directory Domain Services

https://docs.microsoft.com/en-us/azure/active-directory-domain-services/tutorial-create-forest-trust

Microsoft identity platform authentication libraries updates

https://docs.microsoft.com/en-us/azure/active-directory/develop/reference-v2-libraries

Direct federation with AD FS and third-party providers for guest users

https://docs.microsoft.com/pl-pl/azure/active-directory/b2b/direct-federation

Tutorials for integrating SaaS applications with Azure Active Directory

https://docs.microsoft.com/azure/active-directory/saas-apps/tutorial-list


AWS Fargate Cluster coexistence with EC2 instances / Autoscaling Capacity Providers

There is a possibility add to your AWS Fargate Cluster Capacity Providers with autoscaling EC2 instances. You can use it to, debug some Containers – you can just log-in to EC2, where your container is running or optimize the use of EC2 / Fargate instances, especially when you use reserved EC2 instances.

When you add directly Autosaling EC2 instances as Capacity Providers you can receive this kind of errors:

unable to place a task because no container instance met all of its requirements

or

No Container Instances were found in your cluster

The trick is – when you create Launch Configuration please select Community AMI eg.: amzn2-ami-ecs-hvm-2.0.20191212-x86_64-ebs – of course, choose the latest one.

Chose also IAM permission: IAM role as ecsInstanceRole and the most important provide this in user data:

#!/bin/bash
echo ECS_CLUSTER=LastFinal >> /etc/ecs/ecs.config
sudo iptables –insert FORWARD 1 –in-interface docker+ –destination 169.254.169.254/32 –jump DROP
sudo service iptables save
echo ECS_AWSVPC_BLOCK_IMDS=true >> /etc/ecs/ecs.config

After you create autoscaling your instances should bring to live and you should them in your Fargate Cluster:

Now you can add the Capacity provider and Managed termination protection should be disabled.

And now you can Run your Tasks as a Fargate or as an EC2 launch type. Please remember that the Task is compatible with EC2.

Launch command line:

aws ecs create-service –capacity-provider-strategy capacityProvider=EC2CapacityProvider,weight=1 –cluster LastFinal –service-name shellexample –task-definition shell:2 –desired-count 1 –network-configuration “awsvpcConfiguration={subnets=[subnet-068457290b918bf38],securityGroups=[sg-0563e9b190a2ccf65]}”

This member is waiting for initial replication for replicated folder SYSVOL Share and is not currently participating in replication.

This is a similar problem to FRS reinitialize File Replication Service problem described for an example here: https://support.microsoft.com/en-us/help/290762/using-the-burflags-registry-key-to-reinitialize-file-replication-servi


But we need to do it to DFS-R, fast steps:


  1. On source domain controller stop DFS Replication Service.
  2. Open ADSI Edit and msDFSR-Enabled to False, here:


  3. Set msDFSR—Options to 1


  4. Do:

    repadmin /syncall source-dc /APed

    repadmin /syncall /Aed


  5. On all Domain Controllers Open ADSI Edit and msDFSR-Enabled to False, here:


  6. repadmin /syncall source-dc /APed

    repadmin /syncall /Aed

  7. Start DFS Replication Service
  8. Open ADSI Edit and msDFSR-Enabled to True on primary Domain Controller.
  9. Issue DFSRDIAG POLLAD
    repadmin /syncall source-dc /APed

    repadmin /syncall /Aed

  10. On every Domain Controller Open ADSI Edit and set msDFSR-Enabled to True
  11. Issue DFSRDIAG POLLAD
    repadmin /syncall source-dc /APed

    repadmin /syncall /Aed

  12. Now replication of SYSVOL should work again.

Migrating Existing RDS environment to Windows Desktop in Azure

This is Hans On Lab Recording from Microsoft Ignite 2019. You can migrate not only existing Remote Desktop Hosts but also VDI solutions. Script used in this Lab:

Install-Module -Name Microsoft.RDInfra.RDPowerShell
$tenant = “HOLVDI”
$hostpoolname = “rg982109-p”
Add-RdsAccount -DeploymentUrl “https://rdbroker.wvd.microsoft.com”
New-RdsHostPool -TenantName $tenant -Name $hostpoolname
New-RdsRegistrationInfo -TenantName $tenant -HostPoolName $hostpoolname -ExpirationHours 4 | Select-Object -ExpandProperty Token > “$env:PUBLIC\Desktop\token.txt”
Add-RdsAppGroupUser -TenantName $tenant -HostPoolName $hostpoolname -AppGroupName “Desktop Application Group” -UserPrincipalName “user982109@cloudplatimmersionlabs.onmicrosoft.com”
Set-RdsRemoteDesktop -TenantName $tenant -HostPoolName $hostpoolname -AppGroupName “Desktop Application Group” -FriendlyName “WS 2019”
#Install Agents
#https://query.prod.cms.rt.microsoft.com/cms/api/am/binary/RWrmXv
#https://query.prod.cms.rt.microsoft.com/cms/api/am/binary/RWrxrH
Get-RdsSessionHost -TenantName $tenant -HostPoolName $hostpoolname
#aka.ms/wvdweb
New-RdsAppGroup -TenantName HOLVDI -HostPoolName $hostpoolname -Name Wordpad -ResourceType RemoteApp
Get-RdsStartMenuApp -TenantName HOLVDI -HostPoolName $hostpoolname -AppGroupName Wordpad
Get-RdsStartMenuApp -TenantName HOLVDI -HostPoolName $hostpoolname -AppGroupName Wordpad | ? {$_.FriendlyName -match “Wordpad”}
New-RdsRemoteApp -TenantName HOLVDI -HostPoolName $hostpoolname -AppGroupName Wordpad -Name Wordpad -Filepath “C:\Program Files\WindowsNT\Accessories\wordpad.exe” -IconPath “C:\Program Files\WindowsNT\Accessories\wordpad.exe”
Get-RdsRemoteApp -TenantName HOLVDI -HostPoolName $hostpoolname -AppGroupName Wordpad
Add-RdsAppGroupUser -TenantName HOLVDI -HostPoolName $hostpoolname -AppGroupName Wordpad -UserPrincipalName “user982109-1@cloudplatimmersionlabs.onmicrosoft.com”
#aka.ms/wvdweb

Before start please do it (if you do not do it you will receive: Add-RdsAccount : One or more errors occurred. or New-RdsHostPool : User is not authorized to query the management service.):

Add Permission just open these links:

  1. https://login.microsoftonline.com/common/adminconsent?client_id=5a0aa725-4958-4b0c-80a9-34562e23f3b7&redirect_uri=https%3A%2F%2Frdweb.wvd.microsoft.com%2FRDWeb%2FConsentCallback
  2. wait a minute
  3. https://login.microsoftonline.com/common/adminconsent?client_id=fa4345a4-a730-4230-84a8-7d9651b86739&redirect_uri=https%3A%2F%2Frdweb.wvd.microsoft.com%2FRDWeb%2FConsentCallback
  4. wait a minute
  5. Open Azure Active Directory, Enterprise applications – Windows Virtual Desktop – Users and groups and add to your user Tenant Creator Role.
    Start Script
  6. Issue:

    New-RdsTenant -Name $tenant -AadTenantId <Azure Active Directory Tenant ID> -AzureSubscriptionId <Subscription Id>

  7. wait a minute and issue:

    New-RdsRoleAssignment -RoleDefinitionName “RDS Owner” -SignInName “mf@specsourcecom.onmicrosoft.com” -TenantGroupName “Default Tenant Group” -TenantName $tenant

More info here.

Ignite 2019 Hall Of Fame – Most Valuable Professional and Regional Directors

As usually during Microsoft Ignite Conference on a blue stands there was a list of all Most Valuable Professionals and on a black stands all Microsoft Regional Directors.

Microsoft Most Valuable Professionals, or MVPs, are technology experts who passionately share their knowledge with the community.
Microsoft Regional Directors are more focused on business than MVPs, they are independent technology enthusiasts who engage in dealing with and evangelizing one or more of Microsoft technologies in a region.

If you have a question, advice problem to solve you can always count on the help of Microsoft Most Valuable Professionals or Microsoft Regional Directors.

So there is a complete list of Most Valuable Professional during Microsoft Ignite 2019 and if you are MVP or RD you can always find yourself on the list.

A few more pics from List Of Glory:


Learning Pyramid – czyli jak uczyć się i uczyć innych skutecznie

Swojego czasu, mój kolega Certyfikowany Trener Microsoft mawiał – chcesz się nauczyć jakiejś technologii – poprowadź z tego szkolenie. Ja wtedy byłem na początku drogi Trenerskiej, w która tak swoją dragą nie zaangażowałem się nigdy w 100% i wtedy nie do końca się zgadzałem z tym twierdzeniem. Aczkolwiek trzeba przyznać, że coś w tym jest – ucząc innych zwłaszcza dorosłych, napotykając na przeróżne pytania – stajemy się ekspertami w danym temacie.


W czasie konferencji Microsoft Ignite 2019, a tak naprawdę w czasie zorganizowanego dnia dla Certyfikowanych Trenerów Microsoft, poruszony był temat efektywnego uczenia w szczególności dorosłych. Zaprezentowano wyniki badań i tzw. Piramidę Uczenia (Learning Pyramid). Do tej pory, jeszcze za czasów studenckich znałem Piramidę Potrzeb Masłowa (Hierarchia) – w której tak swoją drogą mamy również odesłanie do nauki.

Piramida Masłowa

Przechodząc do rzeczy wspomniana Piramida Nauki, mówi nam o efektywności nauki – czyli jakie są najbardziej efektywne metody nauki:

Learning Pyramid


Mając na uwadze powyższe badania, najbardziej efektywna forma nauki własnej to próba nauki innych – aczkolwiek nie ma co ukrywać, jeżeli jesteśmy “zieloni” z jakiegoś tematu – to ciężko zacząć uczyć innych. Aczkolwiek, jeżeli już mamy trochę wiedzy możemy organizować kursy dla owych “zielonych” w temacie i w ten sposób sami będziemy się rozwijać w danym temacie.

Nie będę się rozwijał nad poszczególnymi piętrami w tejże piramidzie, bo jest to zebranie wydawało się rzeczy oczywistych. Najlepsza nauka przez praktykę – jak coś zrobimy wdrożymy – na pewno się nauczymy. Tak samo obejrzenie czegoś w rzeczywistości jak działa (Demo) daje więcej niż tylko przeczytanie o czymś. A jeszcze więcej to podyskutowanie o czymś.

Co mnie zaskakuje w powyższym opracowaniu, to stopień Audio/Video – tzn. jest bardziej wartościowy niż czytanie. Warto o tym pamiętać, gdy powiemy dziecku “Wyłącz tego youtuba i poczytaj” – z premedytacji nie poruszam tutaj tematu związanego z wartościami, prezentowanymi przez niektórych youtuberów.

Wracając na rynek IT, z którym jestem związany to naszła mnie myśl, że część osób / firm, zapewne nie znając powyższych badań, zaczęło realizować powyższy scenariusz nauki – praktyczne zastosowanie Piramidy Nauki. Niewątpliwie liderem na rynku Polskim był Robert Stuczynski z projektem Virtual Study, gdzie były i nadal są prezentowane materiały szkoleniowe z zakresu IT – swoją drogą jest to kopalnia wiedzy dot. historycznych systemów jak Lotus Notes. Była to realizacja stopnia 3 – Audio / Video, ale zabrakło kolejnych stopni, które to stopnie realizowane są przez niżej wymienione produkty.

Najbardziej daleko z kolei poszedł Mirosław Burnejko, gdzie w oparciu o Dyskusje i prezentacje swojej drogi życiowej zbudował firmę od podstaw i w czasie 2 lat odniósł niesamowity sukces – myślę to o Chmuarowisku. Sam Mirek poszedł dalej i realizuje ostatni stopień tym razem Piramidy Masłowa i chce inspirować innych do realizacji Piramidy od stopnia 3 do późniejszych, a myślę tutaj o Fabryce Kursów, gdzie uczy, jak zarabiać na kursach.

Przeglądając zasoby Internetu, a także uczestnicząc w tzw. Community kolejne osoby niejako pod tym samym szyldem realizują z powodzeniem kolejne przedsięwzięcia szkoleniowe i np. Michał Furmankiewicz wydaje się, że przejął zarządzanie https://szkolachmury.pl/, gdzie co chwile pojawiają się kursy na które wręcz czeka rynek i mam na myśli tutaj Kubernetes i Google Cloud.

Bardzo jestem ciekaw ostatniego produktu, wydaje się dla najbardziej zaawansowanych, a na pewno tworzonych przez ekspertów, którzy zapewne połamali klawiatury wdrażając kolejne yaml’e w usłudze Kubernetes. Mowa tutaj o Łukasz Kałużny w akompaniamencie z Jakub Gutkowski i Piotrkiem Stappem https://poznajkubernetes.pl/ – swoją drogą najbardziej profesjonalna strona.

Na śmierć bym zapomniał o Maciej Aniserowicz – https://edu.devstyle.pl/, którego kursy są najbardziej popularne i odniosły największy sukces – a i mają pojawić się nowe.


Jeżeli chodzi o profesjonalne firmy szkoleniowe, to Centrum Szkoleniowe ABC DATA – Action, a obecnie Cloud Team również oferowała szkolenia Audio / Video – ale śmiem twierdzić, iż za bardzo się nie przyjęły – aczkolwiek w czasie szkoleń wykorzystywane są z powodzeniem wszystkie techniki z Powyższej Piramidy. Natomiast Altkom Akademia oprócz powyższego angażuje uczestników w dyskusje po szkoleniu, gdzie mają oni możliwość zadawania pytań i na odpowiadania na nie i w ten sposób realizują ostatni poziom Piramidy.

W sumie można powiedzieć, że wszyscy realizują strategie Learning Pyramid – dla dobra rozwoju rynku IT. Zastanawiam się czasami czy rynek się nie nasyci i kiedy, aczkolwiek patrząc na ssanie na specjalistów IT nie nastąpi to szybko.

Na koniec bym zapomniał, że sam na tym poletku działam i zapraszam na moje kursy.


Mariusz Ferdyn


PS: Jeżeli kogoś nie wymieniłem, to z czystego zapomnienia. Jednocześnie informuje, iż nie reklamuje powyższych firm kursów, a inwestycja w wiedze to najlepsza inwestycja, ale przed zakupem zwłaszcza w Black Friday i Cyber Monday należy się zastanowić – mimo, że wszyscy oferują zwrot pieniędzy, jeżeli nie będziemy zadowoleni.


Continuously upload files to FTP using PowerShell

Sometimes we need to continuously upload files to FTP from local disk. We can do it using the following PowerShell Script.

import-module NetCmdlets
$i=5
while ($i -eq 5){
new-item c:\wgrywam -itemtype directory
Get-ChildItem C:\CB08 -Recurse |? {$_.LastWriteTime -le (get-date).AddMinutes(-3)} |% {move-item $_.Fullname c:\wgrywam}
Get-ChildItem C:\wgrywam -Recurse |% {send-ftp -server ftp.pol.pl -user uzytkownik -password haslo -localfile $_.Fullname -remotefile $_.name}
#Get-ChildItem C:\wgrywam -Recurse | % { remove-item $_.Fullname }
Remove-Item -Recurse -Force c:\wgrywam
}

So this script simply create temporary directory c:\wgrywam, move to it all files older than 3 minutes from C:\CB08 -Recurse. After that connect to ftp.pol.pl, using username user uzytkownik and password haslo and put there all files from temporary (c:\wgrywam) directory. Finally remove temporary (c:\wgrywam) directory.

To use this you need to install NetCmdlets  from here.

How Azure can help you with performance tests using JMeter

This article is rather dedicated to attendees of http://www.jstalks.net/ conference. You can use this article if you do not attendee to that conference, but probably it will need more engagement from you to understand of flow this:

During this session, you will learn how to adopt Azure to do a performance test using Jmeter. In the simple script, you will launch ~10 VM with installed Jmeter that will be ready to start your performance test. We will also create simple test plan and test your site.

Jmeter – Fast track how to install it:

  • Java 64bit (!!! – all java downloads) Windows Offline (64-bit)
    • https://javadl.oracle.com/webapps/download/AutoDL?BundleId=240728_5b13a193868b4bf28bcb45c792fce896
  • https://archive.apache.org/dist/jmeter/binaries/apache-jmeter-5.1.1.tgz

Just after that it will work, but for better performance, several tweaks needed (the left is the final settings, right is the default one):

jmeter.properties file:

jmeter.bat file (right are desired one):

(all files are at the end of the documents – so you can use control-c, control-v)

JMeter – Test scenario:

So the next one is to launch jmeter.bat and create your first test scenario. How to do it some links:

  • https://jmeter.apache.org/usermanual/build-web-test-plan.html
  • https://octoperf.com/blog/2018/03/29/jmeter-tutorial/

But do not waste time using the previous one, rzetelnekursy, modify it using copy, paste and go ahead with your first test.

Jmeter – distribute tests accrost servers:

https://jmeter.apache.org/usermanual/jmeter_distributed_testing_step_by_step.html

But do not waste time using the previous one, just create new Virtual Machine Scale Sets with the desired scale of VMs. You can use cheap Low Priority VMs for that. To install Apache Jmeter use this cloud-init script:

cloud_init

BTW: you can use this to install JMeter on Linux just copy-paste on your workstation or on any other cloud.

Reconfigure Server to launch tests on salves:

user.properties file:

  • http.connection.stalecheck$Boolean=true
  • server.rmi.ssl.disable=true

jmeter.properties file (left is desired one):

And do not allow communication with 1099 port with the server or just disable the firewall on the server.

And now you can start your distributed tests.

Debug

tail -f /root/apache-jmeter-5.1.1/bin/jmeter-server.log

“java.rmi.ConnectException: Connection refused to host: 10.0.0.6; nested exception is” – solution:

  • Check communication, firewall, etc.
  • Use names instead IP – you can use http://ssl4ip.westeurope.cloudapp.azure.com/

    And this like remote_hosts=10-0-0-4.h.com.pl,10-0-0-5.h.com.pl,10-0-0-7.h.com.pl

  • jmeter.bat file:

    Set rmi_host=-Djava.rmi.server.hostname=10.0.0.6

    set ARGS=, adding one after %rmi_host%

All config files used in this article:

allmodifiedfiles

Official: BOOK OF NEWS, Microsoft Ignite 2019, Orlando, November 4-8, 2019

BOOK OF NEWS Microsoft Ignite 2019:

Ignite2019BookofNews.pdf

Azure News from Microsoft Ignite 2019 – 3 minutes read Mariusz’s bullet list

Here is a list of new Azure features announced during Ignite 2019, that in my opinion you should learn more.

This is not a complete list – just I noticed them, and it is only for Azure. Some of them could be announced before.


Virtual Machines:

  • New Sizes Daav4, Eav4, NVv4, NDv2
  • OS Disk Size 2TB+, 12 TB RAM (VM Gen2)
  • Reservation – pay by month.


Virtual Machine Scale Set:

  • Different Sizes of VMs in Scale Set;
  • Faster provisioning of custom images.


Containers, Kubernetes:

  • Azure Availability Zones;
  • Different Sizes of VMs;
  • API – security with authenticated IP;


Azure Containers Instances:

  • GA – Windows 2019 based containers;
  • Windows Container in your Vnet.


Azure Arc, Azure, Azure Resource Manager:

  • Single Control Plane for any resource anywhere.


Azure Migrate:

  • Assessment for Not Virtualized Environment;
  • CSV import-based discovery;
  • Dependency Mapping without installing Agent;
  • Web App migration;
  • Virtual Desktop migration;
  • GA- Agent Less Migrate for VMWare.


Functions:

  • .net Core 3.0 (Preview);
  • Support Python 3.7;
  • Durable Functions 2.0;
  • Azure Monitor – Logs;
  • PowerShell support GA;
  • Premium Functions – GA.


API Management:

  • Developer Portal – GA;
  • ARC API Management Gateway – Public Preview.


App Service:

  • App Services Certificate – Multiple cert for multiple hostnames


IoT Central:

  • App Templates for Industries;
  • Azure Time Series Insights;
  • Azure Maps;
  • Power BI Integration;
  • AccuWeather integration;
  • Plug & Play;
  • Preview Maps private indoor mapping.


Azure Firewall Manager – Public Preview


Azure Stack:

  • Azure Stack is now Azure Stack HUB, and we have also Azure Stack Edge and Azure Stack HCI


Azure Stack Hub:

  • Cloud-Init
  • Event Hubs
  • Kubernetes Clusters
  • Windows Virtual Desktop – Private Preview

Konwersja ustawień GUI na rejestr i następnie na komendy PowerShell

W przypadku uruchamiania rozwiązań typu Infrastructure as a Code bardzo często korzystamy z tzw. Custom Script Extension, w którym piszemy skrypt PowerShell, który się wykonuje przy kreowaniu maszyny wirtualnej. W przypadku maszyn z systemem operacyjnym Windows zazwyczaj potrzebujemy zmodyfikować rejestr, aby ustawić odpowiednie właściwości maszyny wirtualnej.

System Windows przyzwyczaił nas do wyklikiwania potrzebnych opcji, które tak naprawdę są zmianami w rejestrze i nie dotyczy to tylko ustawień systemu operacyjnego, ale takż np. Office. Jak w takim razie szybko skonwertować ustawienia wyklinane z GUI na skrypt PowerShell.

  1. Ściągamy oprogramowanie porównujące rejestr, przed i po zmianie (https://www.nirsoft.net/utils/registry_changes_view.html).
  2. Uruchamiamy oprogramowanie i robimy Snapshot przed zmianami w GUI.
  3. Następnie wykonujemy zmiany w GUI.
  4. Porównujemy Snapshot rejestru versus obecne wpisy w rejestrze.
  5. Zazwyczaj znajdziemy więcej wpisów w rejestrze, które się zmieniły – np. wpisy dotyczące telemetrii, ale kopiujemy do schowka, tylko te, które są wymagane:

  6. Teraz takie wpisy trzeba przekonwertować na PowerShell, do tej pory robiłem to ręcznie, ale przypadkowo wpadłem na stronę https://reg2ps.azurewebsites.net/, gdzie może to być wykonane z automatu.

    W razie czego kod źródłowy dostępny tutaj: https://github.com/rzander/REG2CI/ , Program NirSoft registrychangesview-x64.

Read-Only Access to Policy Definition and Compliance Reports – fast manual

Create a Custom Role definition file e.g.:

notepad $env:TMP\PolicyReader.json

content:

{
“Name”: “Policy Reader”,
“Id”: “0ab0b1a8-8aac-4efd-b8c2-3ee1fb270be8”,
“IsCustom”: true,
“Description”: “Policy Reader.”,
“Actions”: [
“Microsoft.Authorization/policySetDefinitions/read”,
“Microsoft.Authorization/policyDefinitions/read”,
“Microsoft.Authorization/policyAssignments/read”
],
“NotActions”: [

],
“DataActions”: [

],
“NotDataActions”: [

],
“AssignableScopes”: [
“/subscriptions/28c890b5-46e8-44a2-8f59-30e51cadd7f9”
]
}

Using PowerShell:

Connect-AzAccount
Get-AzSubscription
Select-AzSubscription -SubscriptionId x-x-x-x-xxx
New-AzRoleDefinition -InputFile $env:TMP\PolicyReader.json
Get-AzRoleDefinition | ? {$_.IsCustom -eq $true} | FT Name, IsCustom

Unfortunately, you must do it for each subscription.

You can also use Security Reader role that allows you to access to workspaces and support – https://docs.microsoft.com/pl-pl/azure/role-based-access-control/built-in-roles#security-reader.

This is fast outline – to understand what you are doing please visit: https://docs.microsoft.com/en-us/azure/role-based-access-control/tutorial-custom-role-powershell.


Nat on Windows 2016+ or on Windows 10 – quick config

Sometimes we need to Enable Internal NAT on Windows Especially when we want to share Internet connection from host to Virtual Machine (using Nested Virtualisation in Azure) or using Windows Containers.

Issue commands:

New-VMSwitch –SwitchName “NAT” –SwitchType Internal
New-NetIPAddress –IPAddress 10.0.0.1 -PrefixLength 24 -InterfaceAlias “vEthernet (NAT)”
New-NetNat –Name NATnetwork –InternalIPInterfaceAddressPrefix 10.0.0.4/24

Custom Roles in Azure – case Azure Kubernetes Service (update)

Azure Role Based Access Control is great! You can assign Roles to users to give specific access and actions. But not always you can find specific Role, in this case I needed to add access to specific users to modify Azure Kubernetes Service, but not delete and create a new one.

In this case, we need to create a Custom Role that can do exactly what you want. You can use this process to create any custom role – just there is a fast step by step:

#Install-Module -Name Az -AllowClobber
#Connect-AzAccount
Get-AzSubscription
Select-AzSubscription -SubscriptionId f31d408c-1e0e-478c-a887-ddb7c7ea78d0
Get-AzProviderOperation “Microsoft.ContainerService/*” | Out-GridView
Get-AzRoleDefinition -Name “Azure Kubernetes Service Cluster Admin Role”
Get-AzRoleDefinition -Name “Azure Kubernetes Service Cluster Admin Role” | ConvertTo-Json
Get-AzRoleDefinition -Name “Azure Kubernetes Service Cluster Admin Role” | ConvertTo-Json | Out-File $env:TMP\AKSResizeCluster.json
notepad $env:TMP\AKSResizeCluster.json
New-AzRoleDefinition -InputFile $env:TMP\AKSResizeCluster.json
Get-AzRoleDefinition | ? {$_.IsCustom -eq $true} | FT Name, IsCustom

Modified AKSResizeCluster.json file (please give new name and add subscription scope at the end):

{
“Name”: “Azure Kubernetes Service Cluster Write Role”,
“Id”: “8783b508-5073-4565-aeeb-9d4a28dd6701”,
“IsCustom”: false,
“Description”: “List cluster admin credential action and Write Privileges”,
“Actions”: [
“Microsoft.ContainerService/containerServices/read”,
“Microsoft.ContainerService/containerServices/write”,
“Microsoft.ContainerService/managedClusters/read”,
“Microsoft.ContainerService/managedClusters/write”,
“Microsoft.ContainerService/operations/read”,
“Microsoft.ContainerService/managedClusters/agentPools/read”,
“Microsoft.ContainerService/managedClusters/write”,
“Microsoft.OperationalInsights/workspaces/sharedkeys/read”,
“Microsoft.OperationalInsights/workspaces/read”,
“Microsoft.OperationsManagement/solutions/write”,
“Microsoft.OperationsManagement/solutions/read”,
“Microsoft.ContainerService/managedClusters/agentPools/write”

],
“NotActions”: [

],
“DataActions”: [

],
“NotDataActions”: [

],
“AssignableScopes”: [
“/subscriptions/!!!Your_Subscription_ID!!!”
]
}

Just after that you have a new Role Azure Kubernetes Service Cluster Write Role and you can assign it in IAM, to your K8S cluster in Azure and you have to add it to Resource Group where your Log Analytics are (eg: 78c-a887-ddb7c7ea78d0-WEULog Analytics workspace).

This is fast outline – to understand what you are doing please visit: https://docs.microsoft.com/en-us/azure/role-based-access-control/tutorial-custom-role-powershell

Azure Sphere – First Step (The device is not responding – An unexpected problem occurred. Please try again; if the issue persists, please refer to aka.ms/azurespheresupport)

To setup Azure Sphere Device you need to create Azure Sphere tenant. To do it you need to create it using this command:

azsphere tenant create -n “spheretenantname”


But, you can see:

error: The device is not responding. The device may be unresponsive if it is applying an Azure Sphere operating system update; please retry in a few minutes.


So first please update your device using:

azsphere device recover


After that you can create tenant:

azsphere tenant create -n AZSphereMF


If you do again:

azsphere device show-ota-status

you can see an error like this:

error: An unexpected problem occurred. Please try again; if the issue persists, please refer to aka.ms/azurespheresupport for troubleshooting suggestions and support.


Please ignore it and you can claim device to the created tenant, by:

azsphere device claim


Please remember that you can do it only once per device (It is the security model of Azure Sphere).


Probably you will want to connect your device to WiFi, so list available networks by:


azsphere device wifi scan


And connect to WiFi:

azsphere device wifi add –ssid My5GNetwork –key secretnetworkkey


You can check connection status by issuing:


azsphere device wifi show-status


Now you are ready to deploy your first application to Azure Sphere!

Azure App Service on Linux – mysql and mysqli driver

Azure Web App / Azure App Service on Linux by default do not offer mysql and mysqli driver to connect to MySQL database. The lowest PHP version is 5.6. Sometimes you need to move to the cloud older application.

If your application uses MySQL driver you probably see an error like this:

ErrorException [ Fatal Error ]: Call to undefined function mysql_connect()

So here is an example of how to install the extension to the Azure App Service on Linux, that it is similar to the Windows one. I add MySQL driver to Web App / Azure App Service on Linux, but in a similar way, you can add other extensions.

First, go to Configuration Tab and in configuration settings add PHP_INI_SCAN_DIR where you add files with the configuration of your extensions.

In this example, I added /home/site/ini.

Next, add the directory in your (/home/site/ini) Web App (you can use SSH access or FTP) I suggest to create another directory like /home/site/ext where you put binaries of your extensions.

Finally in /home/site/ini put file .extensions with configuration like:

extension=/home/site/ext/mysql.so

and in /home/site/ext put binary of your extension.

It should look like this:

After putting files please STOP and Start your App Service and extension should be loaded. Please consult your Log Streaming that application is restarted. If you need to compile your own extensions please consult the version of Apache and system in logs, like here:

You can get operating system version by issuing: cat /etc/os-release

Here are examples files that you can use to add mysql driver and mysqli driver:

WebAppMySQLMySQLiExtensions

mysqlnd cannot connect to MySQL 4.1+ using the old insecure authentication

When you move MySQL from your hosting to Azure Database for MySQL and trying to connect to it – you can see something like this:

mysql_connect(): mysqlnd cannot connect to MySQL 4.1+ using the old insecure authentication. Please use an administration tool to reset your password with the command SET PASSWORD = PASSWORD(‘your_existing_password’). This will store a new, and more secure, hash value in mysql.user. If this user is used in other scripts executed by PHP 5.2 or earlier you might need to remove the old-passwords flag from your my.cnf file

On the internet, you can find some advice about setting a password or add a parameter like:

old_passwords=0

It can help with on-premise installation but, for Azure, the solution is to change PHP version to a higher for an example from 5.3.29 to 5.4.16 what is not a big minor change and application can connect to Azure Database for MySQL.


Kiedy przenosisz bazę MySQL z twojego hostingu do Azure Database for MySQL możesz spotkać się z poniższym błędem:

mysql_connect(): mysqlnd cannot connect to MySQL 4.1+ using the old insecure authentication. Please use an administration tool to reset your password with the command SET PASSWORD = PASSWORD(‘your_existing_password’). This will store a new, and more secure, hash value in mysql.user. If this user is used in other scripts executed by PHP 5.2 or earlier you might need to remove the old-passwords flag from your my.cnf file

W internetach znajdziesz podpowiedzi typu, zmiana hasła lub ustawienie parametru:

old_passwords=0

Powyższe może pomóc w bazach danych utrzymywanych na własnych serwerach, ale w moim przypadku dla Azure nie pomogło. Pomogła natomiast zmiana wersji PHP ze starego PHP 5.3.29 na 5.4.16.

Import Database to Azure Database for MySQL or for MariaDB – real case (Got error 1 from storage engine, you need (at least one of) the SUPER privilege(s) for this operation)

Some time ago Microsoft launched Azure Database for MySQL and Azure Database for MariaDB, so we can use these databases as a Platform as a Service. We are not responsible for the operating system, database engine upgrades, security.

If you need to move your workloads to Azure, on you source server simply run a command like this:

mysqldump –single-transaction -u user_name -p database_name > dump.sql

This simply dump your MariaDB or Mysql database to a dump.sql file. After that, you can create Azure Database for MySQL or Azure Database for MariaDB in Azure and connect to it using GUI tool to manage database – MySQL Workbench (https://dev.mysql.com/downloads/workbench/). To download it just please use other downloads section that will not install local MySQL Database server, but just MySQL Workbench.

Just before installing MySQL Workbench please check if you have installed all prerequisites https://dev.mysql.com/resources/workbench_prerequisites.html.

Just after installing GUI please add new MySQL connection to your newly create Azure Database for MySQL or MariaDB.

Usually, To be compatible with your application you will need to disable SSL connection to your database and you must add Ip address that can connect to your database.

After you will be able to connect to the Azure database you are ready to import Database using Server / Data Import option. You have to create a new Default Target Schema.

If something went wrong you will see an error with the line, but usually, you will not receive so much information about this. So better option to import DB is open dump in New Query editor (File / New Query Tab) and load the dump here .

You can just start import by pressing Run .

If you do not create a database before, please do it using this command:

create database database_name;

use database_name;

Use command use database_name; – at first line of your dump, also.

If there is any error importing you will see it on Output pane:

So you can correct your dump and import again.

Here are my simple corrections:

  • Got error 1 from storage engine

CREATE TABLE `clients_log` ( … ) ENGINE=MyISAM AUTO_INCREMENT=12240 DEFAULT CHARSET=utf8    Error Code: 1030. Got error 1 from storage engine

It is just because MyISAM is not supported in Azure Database for MySQL, primarily due to the lack of transaction support which can potentially lead to data loss. This is one of the reasons MySQL switched over to InnoDB as the default.

So you need to replace all ENGINE=MyISAM with simply space (nothing).

  • Access denied; you need (at least one of) the SUPER privilege(s) for this operation

/*!50001 CREATE ALGORITHM=UNDEFINED */ /*!50013 DEFINER=`xxxx_prod`@`localhost` SQL SECURITY DEFINER */    Error Code: 1227. Access denied; you need (at least one of) the SUPER privilege(s) for this operation

You need to modify DEFINER from DEFINER =` xxxx_prod `@`localhost` to DEFINER =`your_username_just_before@_from_Azure_portal`@`%`

Having DB has several advantages and the most important is Intelligent Performance.

Azure Site recovery – Please provide targetAzureVmName that is supported by Azure


Sometimes when we deploy replication in Azure Site Recovery we see this kind of error. The error message seems to be clear – but How to resolve it?

Error ID
70169

Error Message
Enable protection failed as the virtual machine has special characters in its name.

Possible causes
The name ‘KNG-WINDOWS’ contains characters that are not allowed or regarded as reserved words/trademarks by Azure.

Recommendation
Please provide targetAzureVmName that is supported by Azure. If using Powershell, re-run the Enable protection command and use the -TargetName parameter to provide a name for the virtual machine that is supported by Azure. Read more about naming conventions in Azure at https://docs.microsoft.com/en-us/azure/architecture/best-practices/naming-conventions.

Related links
https://docs.microsoft.com/en-us/azure/architecture/best-practices/naming-conventions

How to resolve this error:

  • Go to resource group where your Vault exists and choose Deployments TAB, copy Template JSON – all lines.

  • Go to your vault and go to replicated item that should be in error state and please disable replication.

  • After it please create New Deployment from the template. Just click new and type Template and choose Template deployment.

  • After it please choose to Build your own template in the editor and paste copied template from the point 1 and at almost last line change targetAzureVmName to the supported one.

  • After that click Save and choose the same Resource Group and click Purchase.

Azure Site Recovery – Dynamic Disks or Multiple system disks 1,0 found. Azure doesn’t support multiple system disks

Azure Site Recovery – Dynamic Disks or Multiple system disks 1,0 found. Azure doesn’t support multiple system disks

When we are trying to install Mobility Agent on Windows Server with Raid 1 Operating System Disk we can see this kind of error:

{

“errors”: [

{

“error_name”: “ASRMobilityServiceMultipleBootDisks”,

“error_params”: {

“bootdisk”: “1,0”

},

“default_message”: “Multiple system disks 1,0 found. Azure doesn’t support multiple system disks.”

},

{

“error_name”: “ASRMobilityServiceMultipleSystemDisks”,

“error_params”: {

“systemdisk”: “1,0”

},

“default_message”: “Multiple system disks 1,0 found. Azure doesn’t support multiple system disks.”

}

]

}

The only one solution is to remove Raid 1 – like this:

So simply we need to remove Raid 1.

After that, you will be able to install Azure Site Recovery Mobility Agent. To avoid Multiple OS disk found for the selected VM error like this:

You should disable Raid 1 for C drive and Reserved disk and for me also for Data partition that resided on the same disk.

After establishing replication you can try to add the mirror once again.

Please remember that Azure Site Recovery doesn’t support to replicate Dynamic Disks. So you need to convert these to Basic. You can use for it EaseUs software for it without lost data like here.

After you start replication you can add the disk to Mirror and convert the disk to dynamic and replication will be working.

Step by Step Video.

How to use the Azure Site Recovery Step by Step Course.


connect-azaccount – An error occurred while sending the request.

If you are using Powershel – Az module (AzureRM successor) and after command connect-azaccount you see An error occurred while sending the request.

Probably you are not using the latest version. Please check it:

Get-InstalledModule -Name Az.Accounts -AllVersions | Select-Object Name,Version

All Azure-Powershell releases:

https://github.com/Azure/azure-powershell/releases/

PLESK – NGINX: Cannot assign requested address – during migration not only to Azure

When you trying to move PLESK solution to Azure, but probably not only to Azure and not only PLESK, but also other services based on NGINX you can see this kind of error:

NGINX: Cannot assign requested address.

It is occurred during changing IP address (using plesk bin reconfigurator command described here: https://support.plesk.com/hc/en-us/articles/115001761193-How-to-change-the-IP-address-of-Plesk-server-). To resolve it please add the following line:

net.ipv4.ip_nonlocal_bind = 1

to /etc/sysctl.conf

and run sysctl -p /etc/sysctl.conf.

Sometime especially if you see postfix/smtp Invalid argument error please run:

/usr/local/psa/admin/sbin/mchk –with-spam

It will rebuild postfix malware database and restart postfix.


PS: During changing IP address please check /etc/host file also.

CSV <--- import/export ---> Azure NSG

Sometimes we need to import rules to NSG from an Excell file. I had to do it to allow communication with Salesforce – so I had to implement IP whitelist according to this: https://help.salesforce.com/articleView?id=000003652&type=1.

So the script to do it is here:

$importFile = ‘Salesforce-nsg.csv’
$nsgname = ‘acobybylonsg-nsg’
$nsgrg = ‘acobybylonsg’
$subscription=’a3eaae72-4091-4bb6-8e79-ad91f956ac87′
$rulesArray = @()
##############
Login-AzureRmAccount
Select-AzureRmSubscription -SubscriptionId $subscription
##############
$nsg = Get-AzureRmNetworkSecurityGroup -Name $nsgname -ResourceGroupName $nsgrg
foreach ($rule in import-csv $importFile)
{
$nsg|Add-AzureRmNetworkSecurityRuleConfig `
-Name $rule.Name `
-Description $rule.Description `
-Protocol $rule.Protocol `
-SourcePortRange ($rule.SourcePortRange -split ‘,’) `
-DestinationPortRange ($rule.DestinationPortRange -split ‘,’) `
-SourceAddressPrefix ($rule.SourceAddressPrefix -split ‘,’) `
-DestinationAddressPrefix ($rule.DestinationAddressPrefix -split ‘,’) `
-Access $rule.Access `
-Priority $rule.Priority `
-Direction $rule.Direction
}
$nsg|Set-AzureRmNetworkSecurityGroup

CSV file is here.

Before doing it could be helpful to export NSG using this script:

$exportPath = ‘C:\temp’
$nsgname = ‘acobybylonsg-nsg’
$nsgrg = ‘acobybylonsg’
$subscription=’a3eaae72-4091-4bb6-8e79-ad91f956ac87′
##############
Login-AzureRmAccount
Select-AzureRmSubscription -SubscriptionId $subscription
##############
$nsgs = Get-AzureRmNetworkSecurityGroup -Name $nsgname -ResourceGroupName $nsgrg
#backup nsgs to csv
Foreach ($nsg in $nsgs) {
New-Item -ItemType file -Path “$exportPath\$($nsg.Name).csv” -Force
$nsgRules = $nsg.SecurityRules
foreach ($nsgRule in $nsgRules) {
$nsgRule | Select-Object Name,Description,Priority,@{Name=’SourceAddressPrefix’;Expression={[string]::join(“,”, ($_.SourceAddressPrefix))}},@{Name=’SourcePortRange’;Expression={[string]::join(“,”, ($_.SourcePortRange))}},@{Name=’DestinationAddressPrefix’;Expression={[string]::join(“,”, ($_.DestinationAddressPrefix))}},@{Name=’DestinationPortRange’;Expression={[string]::join(“,”, ($_.DestinationPortRange))}},Protocol,Access,Direction `
| Export-Csv “$exportPath\$($nsg.Name).csv” -NoTypeInformation -Encoding ASCII -Append
}
}

Azure Disk Encryption – upgrade from Azure AD

Old version Azure Disk Encryption with Azure AD app uses Extension AzureDiskEncryption version 1.*.

New Azure Disk Encryption uses Extension AzureDiskEncryption version 2.*. Switching from AAD application Encryption for this encrypted VM isn’t supported yet.

Here is unofficial, not-supported way:

  • On VM using PowerShell as an Admin – disable Encryption, first:

manage-bde -status #write recovery password

Suspend-BitLocker -MountPoint “C:” -RebootCount 0

manage-bde -off c:

manage-bde -status

  • Using regedit delete the following:

HKEY_LOCAL_MACHINE\Software\Microsoft\Windows Azure\BitlockerExtension

HKEY_LOCAL_MACHINE\Software\Microsoft\Windows Azure\HandlerState\Microsoft.Azure.Security.AzureDiskEncryption_1.1.0.4

  • Delete directory:

C:\Packages\Plugins\Microsoft.Azure.Security.AzureDiskEncryption\

  • After that you must shut down VM, not reboot (!) just because Azure Agent install Extension just again. After switching off you have to follow this:

https://rzetelnekursy.pl/azure-disk-encryption-troubleshooting/

Audit what Operating System is trying to run

Sometimes we need to know what application is doing in our operating system. Some scenario when we need it:

  1. We run installer to install application and track what installer trying to launch. I used it to find all components during containerization third party application.
  2. I would like to know what exactly is doing during enabling Azure Disk Encryption.

How to do it?

  • Download – https://download.sysinternals.com/files/Sysmon.zip
  • Unzip it
  • Install using:

sysmon.exe -accepteula –i –h md5,sha256 –n

Sysmon register all network connection and processes that launch in Applications and Services Logs/Microsoft/Widows/Sysmon

  • Alternatively we can do it without installing any application – just run gpedit.msc and configure Audit Process Creation:

  • But it is not all add Include command line in process creation events

After that issue gpupdate /force

Process Creation Events will go to the Security log.

  • Clear in Event Viewer Security log and Sysmon log – you can also delete all logs issuing:

wevtutil el | Foreach-Object {wevtutil cl “$_”}

  • Install application that you can minotor
  • Export Security and Sysmon log to csv
  • Using Notepad++ search for “Process Command Line”. It returns all commands that was issued by the installator.

You can also view 5 last events in every log issuing:

Get-WinEvent -ListLog * -EA silentlycontinue | where-object { $_.recordcount -AND $_.lastwritetime -gt [datetime]::today} | foreach-object { get-winevent -LogName $_.logname -MaxEvents 5 } | Format-Table TimeCreated, ID, ProviderName, Message -AutoSize –Wrap

Consider using and in Azure VM blade.

Other software that can be helpful:

Folder Changes View: https://www.nirsoft.net/utils/folder_changes_view.html

Registry Changes View: https://www.nirsoft.net/utils/registry_changes_view.html

Azure Disk Encryption – Troubleshooting

Azure Disk Encryption technology basis on Windows BitLocker technology– of course only for Windows VMs. Key for BitLocker is stored in Key Vault. Encryption Agent is responsible for transfer key from Key Vault to VM. We have two version old one that use Azure Active Directory (https://docs.microsoft.com/pl-pl/azure/security/azure-security-disk-encryption-prerequisites-aad) and new one without this (https://docs.microsoft.com/pl-pl/azure/security/azure-security-disk-encryption-windows).

AAD version – AzureDiskEncryption version 1.*, without AAD extension 2.*

When to use this manual:

  1. When we use Azure Disc Encryption, before we move VM form one subscription to another we need to suspend BitLocker. Even if we do it and we would like to enable encryption again we need to do it use this procedure
  2. When we enable Azure Disk Encryption (old AAD version) and we receive something like this:

    Provisioning state Provisioning failed. The Key Vault https:… is located in location EastUS2, which is different from the location of the VM, eastus.. KeyVaultAndVMInDifferentRegions

  3. During updating Azure Disk Encryption AAD version to Key Vault only (AzureDiskEncryption 1.* to 2.*) – unsupported
  4. In some scenario after restoring from backup.
  5. To disable Azure Encryption Disk functionality.
  6. AzureDiskEncryption Extension – Provisioning failed
  7. If we see this error:

What we need to do after checking logs C:\WindowsAzure\Logs\Plugins\Microsoft.Azure.Security.AzureDiskEncryption with no-idea what to do next:

  • Suspend Encryption on VM:

Suspend-BitLocker -MountPoint “C:” -RebootCount 0

You can check status issuing:

manage-bde -status

Save numerical recovery password – it can be helpful in any case of problems.

  • Try to disable Encryption on Azure:

$VMName = ‘szyfraadregion’
$VMRGName = ‘szyfr_aad_region’
Disable-AzVMDiskEncryption -ResourceGroupName $VMRGName -VMName $VMName

and

Remove-AzVMDiskEncryptionExtension -ResourceGroupName $VMRGName -VMName $VMName

  • Try to disable encryption on disks OS and data disks:

$RG=$VMRGName
(get-azurermvm -ResourceGroupName $VMRGName -Name $vmname).StorageProfile.OsDisk
$diskName=((get-azurermvm -ResourceGroupName $RG -Name $vmname).StorageProfile.OsDisk.Name)
$disk = Get-AzureRmDisk -ResourceGroupName $RG -DiskName $diskName
$disk.EncryptionSettings.Enabled = $false
$disk.EncryptionSettings.DiskEncryptionKey = $null
$disk.EncryptionSettings.KeyEncryptionKey = $null
$disk | Update-AzureRmDisk
(get-azurermvm -ResourceGroupName $VMRGName -Name $vmname).StorageProfile.DataDisks #Proceed for every disk
$diskName=((get-azurermvm -ResourceGroupName $RG -Name $vmname).StorageProfile.DataDisks.Name)
$disk = Get-AzureRmDisk -ResourceGroupName $RG -DiskName $diskName
$disk.EncryptionSettings.Enabled = $false
$disk.EncryptionSettings.DiskEncryptionKey = $null
$disk.EncryptionSettings.KeyEncryptionKey = $null
$disk | Update-AzureRmDisk


  • Now we need to recreate VM (we cannot usually disable encryption if there is any error) – just Export template – it usually not exports Disk Encryption

  • Delete Only VM – disk networks and rest resources will not be deleted (ensure that VM is deleted – wait a while):

  • Recreate VM (Template Deployment – Build your own template in the editor) – in template paste content from point 4 and remove some thins (if we restore from backup probably we will have less things to remove):

  • Remove OsProfile
  • Remove Image Preference
  • Remove Disk Size
  • Change FromImage to Attach
  • Remove Encryption

Remove marked items.

  • Create VM from template – use the same Resource Grout that we deleted VM.
  • Log to the VM and Disable Encryption:

Now we have disabled Azure Encryption Disk functionality.

You can enable encryption again -please remember that you should use the same version that was use before (AAD or without AAD). Please also remember that in AAD encryption Key vault has to be in the same region as VM.

Azure Disk Encryption with AAD:

$aadClientSecret = “EnableAADEncryptionPa#!@Komplicated”
$aadClientSecretSec = ConvertTo-SecureString -String $aadClientSecret -AsPlainText -Force
$azureAdApplication = New-AzADApplication -DisplayName “DiskEncryptAAD8” -HomePage “https://DiskEncryptAAD8” -IdentifierUris “https://DiskEncryptAAD8” -Password $aadClientSecretSec
$servicePrincipal = New-AzADServicePrincipal –ApplicationId $azureAdApplication.ApplicationId
$keyVaultName = ‘keycentral’
$aadClientID = $azureAdApplication.ApplicationId
$KVRGname = ‘keycentral’
Set-AzKeyVaultAccessPolicy -VaultName $keyVaultName -ServicePrincipalName $aadClientID -PermissionsToKeys ‘WrapKey’ -PermissionsToSecrets ‘Set’ -ResourceGroupName $KVRGname
Set-AzKeyVaultAccessPolicy -VaultName $keyVaultName -ResourceGroupName $KVRGname -EnabledForDiskEncryption
$KeyVault = Get-AzKeyVault -VaultName $KeyVaultName -ResourceGroupName $KVRGname
$DiskEncryptionKeyVaultUrl = $KeyVault.VaultUri
$KeyVaultResourceId = $KeyVault.ResourceId
$sequenceVersion = [Guid]::NewGuid();
Set-AzVMDiskEncryptionExtension -ResourceGroupName $VMRGname -VMName $vmName -AadClientID $aadClientID -AadClientSecret $aadClientSecret -DiskEncryptionKeyVaultUrl $diskEncryptionKeyVaultUrl -DiskEncryptionKeyVaultId $KeyVaultResourceId -VolumeType ‘all’ –SequenceVersion $sequenceVersion;

There will be VM restart.

Without AAD:


$KVRGname = ‘Key_Vault_Name’;
$VMRGName = $RG                      #Key_Vault_resourceGroup
$KeyVaultName = ‘key_vault;
$KeyVault = Get-AzKeyVault -VaultName $KeyVaultName -ResourceGroupName $KVRGname
$diskEncryptionKeyVaultUrl = $KeyVault.VaultUri;
$KeyVaultResourceId = $KeyVault.ResourceId;
Set-AzVMDiskEncryptionExtension -ResourceGroupName $VMRGname -VMName
$vmName -DiskEncryptionKeyVaultUrl $diskEncryptionKeyVaultUrl -DiskEncryptionKeyVaultId $KeyVaultResourceId;

There will be VM restart.

If we change from AAD version 1.0 to version without 2.0 just before last point on the VM we need to uninstall Agent and clean configuration – This is not supported scenario, but you can read about this here.

Please always remember that we can check BitLocker status using:

manage-bde -status

or we can also check Event Viewer:


Azure Application Gateway – Multisite

Usługa Microsoft Azure Application Gateway oferuje rozwiązanie do równoważenia obciążenia protokołu HTTP, które działa w oparciu o równoważenie obciążenia warstwy 7. Może być wzbogacone o usługę Web Application Firewall, które zabezpieczy witrynę przed atakami takimi jak XSS lub SQL injection.

Usługa jest wyjątkowo opłacalna, gdy porównamy cenę tejże usługi w chmurze z usługami On-Prem, gdzie musimy kupić odpowiedni sprzęt to ceny zaczynają się od 5000 i to dolarów. A tak naprawdę powinniśmy kupić droższe urządzenia i dla zapewnienia HA minimum dwa – w Azure cena przetworzenia 1 TB danych z usługą WAF zamknie się w okolicach 200 dolarów miesięcznie – z czego połowa tejże ceny to opłata za przetwarzanie danych.

Poniżej przedstawię konfigurację Azure Application Gateway, w konfiguracji obsługującej dwie witryny. Założono, że serwer aplikacji IIS mamy już uruchomiony (nota bene na maszynie wirtualnej) i serwuje dwie witryny. Jedną pod adresem głównym – czyli http://10.1.0.4/, a drugą pod /Site2 czyli http://10.1.0.4/Site2/. Nasza docelowa konfiguracja będzie wyglądała jak poniżej:

Przy okazji, jeżeli chcemy coś testować za pomocą SSL i https polecam skorzystać z mojego projektu SSL for Every IP – http://ssl4ip.westeurope.cloudapp.azure.com/ gdzie:

10-0-0-1.h.com.pl resolves to 10.0.0.1

11-1-0-1.h.com.pl resolves to 11.1.0.1

192-168-1-1.h.com.pl resolves to 192.168.1.1

8-8-8-8.h.com.pl resolves to 8.8.8.8

Mamy też dostępny certyfikat z kluczem prywatnym dla *.h.com.pl – a więc możemy mieć dostępne witryny, ala https://192-168-1-1.h.com.pl z zaufanym certyfikatem.

Po kolei w portal Azure wykonujemy:

  1. Tworzymy Application Gateway (Sieć musi mieć dedykowaną podsieć dla obsługi Application Gateway)
  2. Dodaj serwery do pul zaplecza
  3. Tworzymy Listener dla portu 443 – tutaj musimy wgrać certyfikat.

  4. Tworzymy Rules dla protokołu SSL 443

Od tego momentu możemy otwierać strone główną używając adresu IP zarówno wykorzystując http, jak i SSL (https). Możemy dodać odpowiednie wpisy w DNS, aby to robić za pomocą nazw FQDN.

Teraz dokonany konfiguracji obsługujących wiele stron, a płacić będziemy tylko za jednego Application Gateway wraz z jednym wystąpieniem WAF.

  1. Kasujemy utworzony Listener na porcie 443 – gdyż, pierwszy w kolejności musi być obsługujący stronę przez podanego FQDN
  2. Tworzymy Listener dla dedykowanego adresu FQDN:

  3. Gdy potrzeba dodajemy odpowiedni wpis w DNS (CNAME) wskazujący na IP – chyba, że korzystamy z projektu Magic DNS – jak w przykładzie.
  4. Dodajemy Listener dla portu 443 ponownie jak w punkcie 3.
  5. Dodajem HTTP settings, jako przekierowanie na inna witrynę – tutaj można by też używać opcji Override host name:

  6. Następnie dodajemy Basic Rule jak tutaj:

  1. Końcowa praca to dodanie usuniętej wcześniej Rule dla portu 443, czyli:


Azure Application Gateway Service provides an HTTP load balancing solution that is based on layer 7 load balancing. It can include Web Application Firewall, which will secure the site against attacks such XSS or SQL injection.

The Azure service is rather cheap If we compare the price with On-Prem services where we need to buy the right equipment then prices start from 5000 USD. And in fact we should buy more expensive devices to provide HA (two devices) – in Azure the price of processing 1 TB of data with WAF service will close around 200 dollars a month – of which half of the price is a data processing fee.

Below I will introduce the configuration of Azure Application Gateway, in a configuration that supports two sites. Assume that there is a IIS application server with two sites. One at the main address that is http://10.1.0.4/, and the other under /site2 – http://10.1.0.4/Site2/. Our target configuration/solution will look like the following:

By the way, if we want to test something using SSL and HTTPS I recommend to use my project SSL for Every IP- http://ssl4ip.westeurope.cloudapp.azure.com/ Where:

10-0-0-1.h.com.pl resolves to 10.0.0.1

11-1-0-1.h.com.pl resolves to 11.1.0.1

192-168-1-1.h.com.pl resolves to 192.168.1.1

8-8-8-8.h.com.pl resolves to 8.8.8.8

You can also download a certificate with private key for *. h.com.pl – so we can have sites, like https://192-168-1-1.h.com.pl with trusted certificate.

How to configure Application gateway that support multisite:

  1. Create Azure Application Gateway (network must have a dedicated subnet for Application gateway support)
  2. Add servers to backend pools
  3. Create a Listener for port 443 – here we have to upload the certificate:

  4. Create Rules for SSL (443 port):

From this point on, we can open the homepage using an IP address both using HTTP and SSL (HTTPS). We can add the appropriate entries in DNS to do so by using FQDN names.

Let’s do a setup that supports multiple pages, and you will only pay for one Application Gateway along with one WAF instance.

  1. Please delete the created Listener on port 443 – because, first in order must be hosting the page by the given FQDN.
  2. Create a Listener for a dedicated FQDN:

  3. We need to add an appropriate DNS (CNAME) entry pointing to the IP-unless we use the Magic DNS project – as in the example.
  4. Add the Listener for port 443 again as in step 3.
  5. Add HTTP settings as a redirect to another site – you can also use the Override host name option here:

  6. Then we add the Basic Rule as here:

  1. The final work is to add the previously removed Rule for port 443, which is:


Completle solution / Pełne rozwiązanie na screenach:

When you cannot do something in portal.azure.com eg. This value neither an IP address nor a fully qualified domain name (FQDN). / Kiedy portal.azure.com nie działa

During configuration of Azure Application Network Gateway – multi-site listener, after entering Host Name you can see:

This value neither an IP address nor a fully qualified domain name (FQDN), event that FQDN is correct.

The solution is to provide different address like rzetelnekursy.pl save it and go to https://resources.azure.com/ – you can see here your complete Azure environment in json format.

After that please go to your resource via subscription – resourceGroups – your resource name – providers – your resource name like here:

Please click Edit, and replace value that value that you enter eg. rzetelnekursy.pl with desired one, like here:

After that press Read/Write and PUT option.

Desired configuration should be saved and you should be able to see it in portal:

The above method can be used not only for configuration, as in this case, but always when portal.azure.com does not allow us to perform some action.


Podczas konfigurowania Azure Application Network Gateway – multi-site listener, po wprowadzeniu nazwy hosta można zobaczyć:

Ta wartość nie adres IP ani w pełni kwalifikowaną nazwę domeny (FQDN), nawet – kiedy FQDN jest poprawna.

Rozwiązaniem jest zapisanie na chwile adres jak rzetelnekursy.pl, a następnie przejście do https://resources.azure.com/ – można zobaczyć tutaj swoje kompletne środowisko Azure w formacie JSON.

Następnie należy przejść do zasobu za pośrednictwem subskrypcji – grypy Zasobów – konkretnego zasobu, jak tutaj:

Proszę kliknąć Edytuj i zastąpić wartość wprowadzaną np. rzetelnekursy.pl pożądaną wartością, jak tutaj:

Następnie pozostaje nam wciśniecie opcji Read/Write i PUT.

Pożądana konfiguracja powinna być zapisana i powinniśmy zobaczyć ją w portalu:

Powyższa metoda może być stosowana nie tylko do konfiguracji, tak jak w tym wypadku Application Gateway, ale zawsze, kiedy portal.azure.com nie pozwala nam wykonać jakiejś akcji.

WinSxs – tutaj trzymane są wszelkie aktualizacje – jak go przeczyścić / How to clean WinSXS directory

Jeżeli jeszcze mamy jakieś stare serwery Windows 2008 lub Windows 2008 R2 (ale nie tylko) może się zdarzyć, iż zacznie na nich brakować miejsca. Związane jest to z tym, iż aktualizacje i ewentualnie stare Service Packi wymagają wyczyszczenia. Aby to zrobić bezpiecznie należy uruchomić program cleanmgr.exe. I powinno się nam pojawić coś takiego:

I dalej mamy graficzny interface użytkownika, więc wiadomo co robić. Na serwerach, aby mieć dostęp do programu teoretycznie należy zainstalować Desktop Expirience i zrestartować serwer. Teoretycznie, a to dlatego, że wystarczy wykonać:

Windows Server 2008 R2 64-bit:

copy C:\Windows\winsxs\amd64_microsoft-windows-cleanmgr_31bf3856ad364e35_6.1.7600.16385_none_c9392808773cd7da\cleanmgr.exe %systemroot%\System32

copy C:\Windows\winsxs\amd64_microsoft-windows-cleanmgr.resources_31bf3856ad364e35_6.1.7600.16385_en-us_b9cb6194b257cc63\cleanmgr.exe.mui %systemroot%\System32\en-us

cleanmgr.exe

Windows Server 2008 64-bit:

copy C:\Windows\winsxs\amd64_microsoft-windows-cleanmgr.resources_31bf3856ad364e35_6.0.6001.18000_en-us_b9f50b71510436f2\cleanmgr.exe.mui %systemroot%\System3

copy C:\Windows\winsxs\amd64_microsoft-windows-cleanmgr_31bf3856ad364e35_6.0.6001.18000_none_c962d1e515e94269\cleanmgr.exe.mui %systemroot%\System3\en-us

cleanmgr.exe


If we still have some old Windows 2008 servers or Windows 2008 R2 (but not only), it may happen that there will be a lack of space. This is due to the fact that updates and old Service Packs require cleaning. To do this safely, run the cleanmgr.exe program. And we should see something like this:

And then we have a graphical user interface, so you know what to do. On servers, to access the program theoretically, you must install Desktop Expirience and restart the server. Theoretically, and that’s because you just can to do:

Windows Server 2008 R2 64-bit:

copy C:\Windows\winsxs\amd64_microsoft-windows-cleanmgr_31bf3856ad364e35_6.1.7600.16385_none_c9392808773cd7da\cleanmgr.exe %systemroot%\System32

copy C:\Windows\winsxs\amd64_microsoft-windows-cleanmgr.resources_31bf3856ad364e35_6.1.7600.16385_en-us_b9cb6194b257cc63\cleanmgr.exe.mui %systemroot%\System32\en-us

cleanmgr.exe

Windows Server 2008 64-bit:

copy C:\Windows\winsxs\amd64_microsoft-windows-cleanmgr.resources_31bf3856ad364e35_6.0.6001.18000_en-us_b9f50b71510436f2\cleanmgr.exe.mui %systemroot%\System3

copy C:\Windows\winsxs\amd64_microsoft-windows-cleanmgr_31bf3856ad364e35_6.0.6001.18000_none_c962d1e515e94269\cleanmgr.exe.mui %systemroot%\System3\en-us

cleanmgr.exe

H323 Video Terminals and Skype for Business

Skype for Business is still a standard with B2B audio/video communication, but sometime we need to integrate it with our Polycom, Sony and other H323 Video Terminals. Using Test StarLeaf system we can do it without any integration with Skype just forward received invitation to skype@starleaf.com and we receive address that we should connect to our meeting from H323 Video Terminal. Of course our Video Terminal should have internet access and our Skype For Business should accept connection from other tenants. We can test it for free, but if we need to use it on production need to buy a proper service.

At this moment screensharing is not working and we are waiting for Microsoft Teams Support.


Skype for Business nadal jest standardem komunikacji B2B audio / wideo, ale czasami musimy go zintegrować z Terminalami Video H323, takimi jak Polycom czy też Sony. Korzystając z testowego systemu StarLeaf możemy to zrobić bez jakiejkolwiek integracji ze Skype, wystarczy przesłać dalej zaproszenie Skype na adres skype@starleaf.com, a otrzymamy adres, pod który powinniśmy podłączyć się z Terminala Video H323. Oczywiście nasz terminal powinien mieć dostęp do internetu, a nasz Skype For Business powinien akceptować połączenia od innych firm. Całość możemy przetestować zupełnie za darmo, baz żadnych zapisów itp/itd.

W tej chwili przeglądanie ekranu nie działa i czekamy na wsparcie dla Microsoft Teams.


More info/Więcej informacji: https://docs.microsoft.com/en-us/microsoftteams/cloud-video-interop and https://docs.microsoft.com/en-us/skypeforbusiness/plan-your-deployment/video-interop-server

«< 4 5 6 7 8 >»
Projekt i wykonanie: Mobiconnect i fast-sms.net   |    Regulamin
Ta strona korzysta z ciasteczek aby świadczyć usługi na najwyższym poziomie. Dalsze korzystanie ze strony oznacza, że zgadzasz się na ich użycie.Zgoda

Added to Cart

Keep Shopping